

大家有木有注意到,本站的侧栏“最新留言”模块是带有头像的,而 Z-BlogPHP 默认的最新留言模块是没有头像只有文字的,所以应用中心推出了很多带头像留言模块的插件,这些插件是直接挂在 Index_Begin,可能会增加查询次数而使网页打开速度变慢。本站今天就给大家带来如何纯代码实现侧栏带头像“最新留言”模块。(PS:如果主题自带此功能,就不需要再次折腾了!)

解决方案
- 在主题 include.php 内加入获取最新留言并屏蔽管理员的函数;
- 在主题 CSS 样式内添加最新留言头像样式;
- 在主题 template 模板目录下新建 module-comments.php 挂载最新留言模块;
- 刷新缓存,编辑保存留言模块。
具体实现步骤
1、在主题 include.php 的 <?php 内添加如下函数:
- if (!function_exists(‘Sidebar_Module_Get_Comments’)){
- function Sidebar_Module_Get_Comments(){
- global $zbp;
- $i = 6; //数字6请自行替换为需要显示的评论个数
- $w=array();
- $w[]=array(‘=’, ‘comm_IsChecking’, 0);
- $arr=explode(‘,’,’1′); //数字’1’请替换为管理员ID
- $w[]=array(‘NOT IN’,’comm_AuthorID’,$arr);
- $comments = $zbp->GetCommentList(
- ‘*’,
- $w,
- array(‘comm_PostTime’ => ‘DESC’),
- $i,
- null);
- return $comments;
- }
- }
2、在主题 CSS 样式内添加最新留言样式:
- #divComments dd,#divComments ul{padding: 0;margin: 0;}
- #divComments li{position:relative;width:100%;height:60px;overflow:hidden;padding:10px 10px 10px 60px;border:0;border-top:1px solid #eee;-webkit-box-sizing:border-box;-moz-box-sizing:border-box;box-sizing:border-box;background-image:none;}
- #divComments li:nth-child(1){border-top:0;}
- #divComments li span.zb_avatar{position:absolute;left:10px;top:10px;width:40px;height:40px;}
- .zb_avatar img{width:40px;height:40px;border-radius:50%;border:0;margin:0;padding:0;-webkit-transition:.4s;-webkit-transition:-webkit-transform.4s ease-out;transition:transform.4s ease-out;-moz-transition:-moz-transform.4s ease-out;}
- #divComments li:hover .zb_avatar img{transform:rotateZ(60deg);-webkit-transform:rotateZ(60deg);-moz-transform:rotateZ(60deg);}
- #divComments li small{line-height:20px;height:20px;overflow:hidden;font-size:11px;color:#999;display:block;border:0;margin:0;padding:0;}
- #divComments li p{line-height:20px;height:20px;overflow:hidden;font-size:14px;display:block;margin:0 0 3px 0;padding:0;}
3、在主题 template 目录下添加最新留言模板文件,新建 module-comments.php 文件,内容如下:
- {php}
- $comments=Sidebar_Module_Get_Comments();
- {/php}
- {foreach $comments as $comment}
- <li><span class=“zb_avatar”><a href=“{$comment->Post->Url}#cmt{$comment->ID}”><img src=“{$comment->Author->Avatar}” alt=“avatar”></a></span><p><a href=“{$comment->Post->Url}#cmt{$comment->ID}”>{TransferHTML($comment->Content, ‘[noenter]’)}</a></p><small>{htmlspecialchars($comment->Author->StaticName)} 评论于:{$comment->Time(‘m-d’)}</small></li>
- {/foreach}
4、在后台首页刷新缓存,编辑并保存最新留言模块。
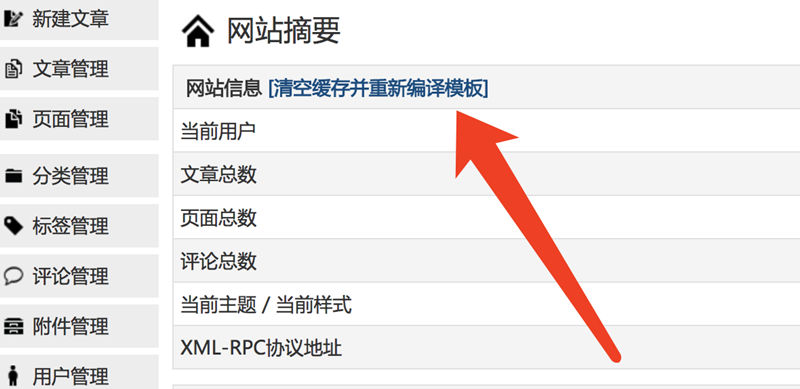
第一步:清空缓存并重新编译模板
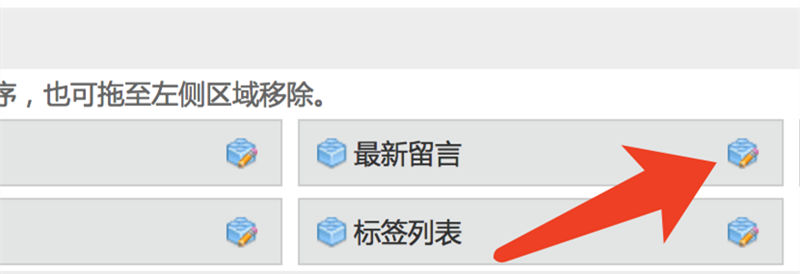
第二步:后台左侧的模块管理中点击『最新留言』编辑按钮
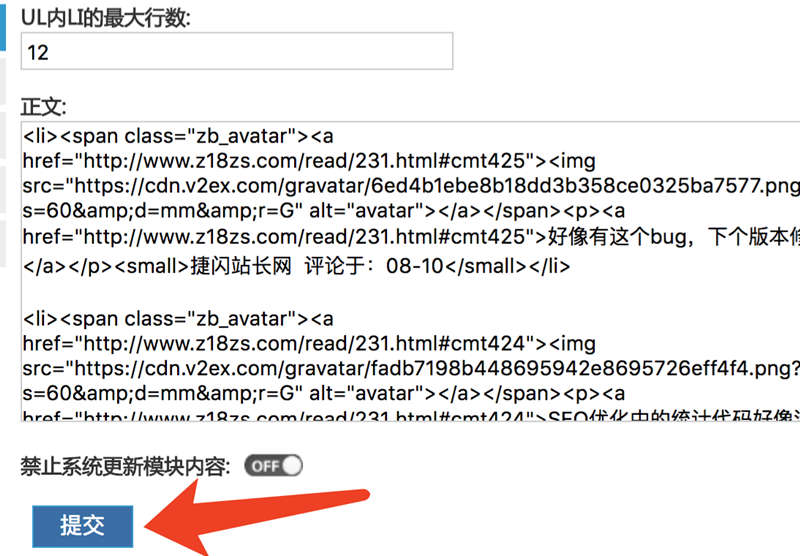
第三步:点击『提交』按钮即可
5、刷新首页,查看侧栏,大功告成。


 桂公网安备 45010502000016号