

据可靠的新闻网数据显示,阿里巴巴每天被黑客攻击的次数高达三亿多次。跨站攻击、CC 攻击、DDOS 攻击,甚至还有些站长遭遇了“可怕的”刷流量,作为一个普通的小站长,十几二十块钱瞬间没有的滋味实在是不舒服。攻防就像是天平两端的两个物件,一直是你多我增的趋势,从诞生之日起就摇摆不定。话不多说,今天树懒先生告诉大家如何利用 NGINX-LUA 给服务器添加高可靠的 WAF 防护。
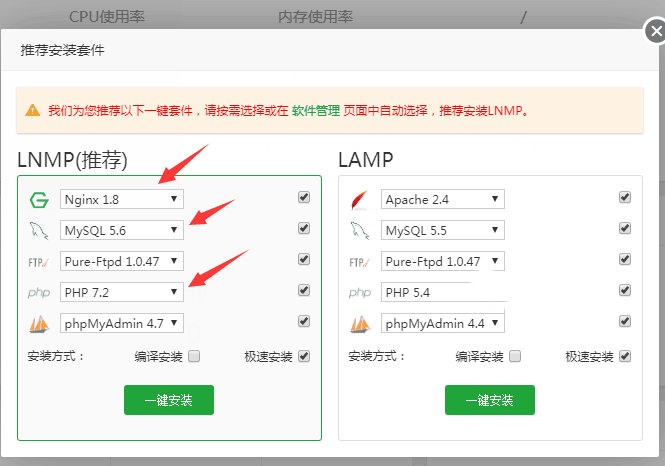
自从军哥的LNMP更新到 1.5 以后 LNMP 配置中添加了 Enable_Nginx_Lua=’y’选项,也就是支持一键安装 Nginx_Lua 了,这对于像树懒先生这样水平的站长简直就是福利啊。在默认状态中这个选项应该是“n”的,所以我们需要在服务器的/root/lnmp1.5 目录下更改 lnmp.conf 文件中的 Enable_Nginx_Lua=’n’为 Enable_Nginx_Lua=’y’,然后我们重新编译一下 NGINX 具体代码如下:
//进入服务器 SSH 控制台,依次执行以下命令
cd lnmp1.5
./upgrade.sh nginx
接下来输入括号中的版本号,进行重新编译。树懒先生用的是 1.14 版本,片刻后已经编译完成,接下来我们 wget 一下 lua 的文件到服务器,在控制台执行一下代码:
wget https://github.com/loveshell/ngx_lua_waf/archive/master.zip解压缩,并移动到我们需要的目录去
unzip master.zip
mv ngx_lua_waf-master/* /usr/local/nginx/conf/waf/
我们将服务器/usr/local/nginx/conf/waf/目录下的 config.lua 下载到本地,这个是 WAF 的配置文件,图中是树懒先生的配置。
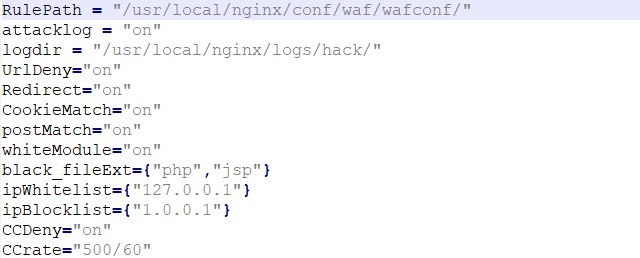
下面将完整的配置代码贡献出来了,直接覆盖 config.lua 就可以了
RulePath = "/usr/local/nginx/conf/waf/wafconf/"
attacklog = "on"
logdir = "/usr/local/nginx/logs/hack/"
UrlDeny="on"
Redirect="on"
CookieMatch="on"
postMatch="on"
whiteModule="on"
black_fileExt={"php","jsp"}
ipWhitelist={"127.0.0.1"}
ipBlocklist={"1.0.0.1"}
CCDeny="on"
CCrate="500/60"
html=[[
<html xmlns="http://www.w3.org/1999/xhtml"><head>
<meta http-equiv="Content-Type" content="text/html; charset=utf-8">
<title>网站防火墙</title>
<style>
p {
line-height:20px;
}
ul{ list-style-type:none;}
li{ list-style-type:none;}
</style>
</head>
<body style=" padding:0; margin:0; font:14px/1.5 Microsoft Yahei, 宋体,sans-serif; color:#555;">
<div style="margin: 0 auto; width:1000px; padding-top:70px; overflow:hidden;">
<div style="width:600px; float:left;">
<div style=" height:40px; line-height:40px; color:#fff; font-size:16px; overflow:hidden; background:#FF0000; padding-left:20px;">树懒先生的 WAF 安全防火墙</div>
<div style="border:1px dashed #cdcece; border-top:none; font-size:14px; background:#fff; color:#555; line-height:24px; height:220px; padding:20px 20px 0 20px; overflow-y:auto;background:#f3f7f9;">
<p style=" margin-top:0px; margin-bottom:0px; margin-left:0px; margin-right:0px; -qt-block-indent:0; text-indent:0px;"><span style=" font-weight:600; color:#fc4f03;">您的请求带有不合法的参数,已被 WAF 安全防护自动拦截!</span></p>
<p style=" margin-top:0px; margin-bottom:0px; margin-left:0px; margin-right:0px; -qt-block-indent:0; text-indent:0px;">可能原因:您提交的内容包含危险的攻击请求</p>
<p style=" margin-top:12px; margin-bottom:12px; margin-left:0px; margin-right:0px; -qt-block-indent:1; text-indent:0px;">如何解决:</p>
<ul style="margin-top: 0px; margin-bottom: 0px; margin-left: 0px; margin-right: 0px; -qt-list-indent: 1;"><li style=" margin-top:12px; margin-bottom:0px; margin-left:0px; margin-right:0px; -qt-block-indent:0; text-indent:0px;">1)检查提交内容是否合法;</li>
<li style=" margin-top:0px; margin-bottom:0px; margin-left:0px; margin-right:0px; -qt-block-indent:0; text-indent:0px;">2)立刻使用杀毒软件全盘杀毒并刷新重试;</li>
<li style=" margin-top:0px; margin-bottom:0px; margin-left:0px; margin-right:0px; -qt-block-indent:0; text-indent:0px;">3)如为普通网站访客,请联系 树懒先生 处理:[email protected]。</li></ul>
</div>
</div>
</div>
</body></html>
]]
这还不算完,我们看到 logdir = “/usr/local/nginx/logs/hack/” 一项中我们开启了日志,所以还要最后执行一下代码。一般 WAF 都会输出日志,如果不需要日志只需要将 attacklog 一项调成 off 即可,然后忽略下面的代码:
mkdir -p /usr/local/nginx/logs/hack/
chown -R www:www /usr/local/nginx/logs/hack/
chmod -R 755 /usr/local/nginx/logs/hack/
最后重启 NGINX 即可,LNMP 可以执行这个代码重启 lnmp restart,我们进入一个不正常的链接,便会发现被阻止了,而且还会出现如图所示的警告信息:

树懒先生说句良心话,其实CDN所谓的 WAF 都是表面功夫,一旦暴露真实 IP 立刻凉凉,前两天树懒先生就发现有些站长的SSL 检测链接直接暴露了真实 IP,抱着试一下的心态顺着 IP,树懒先生还顺利进入了数据库后台…话说这站长也不改一下默认 root 密码,还好树懒先生没有恶意,要不然后果真的不敢想,还真是百密一疏啊。


 桂公网安备 45010502000016号